 Skip to content


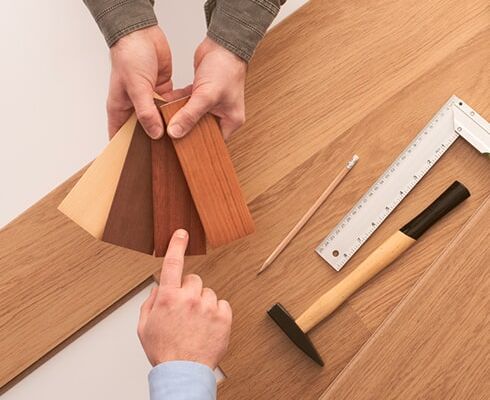


Hardwood flooring buying guide
Wood flooring can be made of hardwood, also engineered wood flooring. So, for the purchase keep in mind these 5 useful tips.
Tip #1: Installation type

If you purchase hardwood flooring, costs may increase because it requires nail-down installation; however, it may be more durable. Conversely, if you purchase engineered wood flooring, installation can be either click or glue-down (adhered to the board).
Tip #2: Underlayment

Likewise, hardwood flooring requires an underlayment, but, if it is engineered wood, it only requires a moisture barrier.
Tip #3: Materials needed

Keep in mind that wood expands and contracts and requires time to acclimate. Therefore, it is necessary to include spacers. Also, if the installation is with glue. Do not forget to include it.
Tip #4: Manufacturer’s instructions
It will always be necessary to check the manufacturer’s instructions because your floor may require more or less time to acclimate. Also to determine if underlayment is required.
Tip #5: Part alignment
Install your hardwood floor perpendicular to the floor joists. Also, the pieces should be parallel to the longest wall as this will give your floor more stability.

Hardwood flooring installation cost
There are hardwood floors, also engineered wood floors. Therefore, the cost of this installation can vary greatly. In addition, both have different types of installation. However, here are the approximate costs.
Average total project costs for hardwood flooring are between $4.00 – $6.00 per square foot (sqft).
These costs include:
- Installation: $2.50 – $3.50 per square foot (sqft).
- Materials: $2.40 per square foot (sqft).
- Underlayment: $0.30 per square foot (sqft).
Remember that your project quotation will certainly include the detail of each element. Also, if you have any questions, we are here to serve you.

Hardwood flooring installation guide
The steps necessary for the hardwood flooring installation depend on the type of flooring you have purchased, because the way it is installed is different. Below are the general steps by type of installation.
Glue down hardwood flooring installation
This type of installation allows you to bond your new floor to the subfloor, it is especially ideal for concrete floors. These are the steps required:

Step 1: Install first rows
To begin, spread the glue on the floor, use the necessary amount only for the first few rows, as it may dry out. Place the first row of boards on the starting wall, leaving the spacers in place.
Then place the second row. To do this, insert the groove into the tongue of the first row, click the pieces together to fit. Next, tap with the rubber mallet to secure the pieces. Now glue the piece to the floor with the glue.
Step 2: Install remaining rows
Second, follow the instructions in step 1 for the remaining rows. Spread the glue in two or three rows at a time, because the glue dries in about 60 minutes.
At the end of each row, you will need to cut the pieces. However, you can use the leftover piece to start your new rows. In this way, your floor design will look beautiful.
Nail down hardwood flooring installation
Your hardwood floor is installed with nails. Therefore, this type of installation is designed to last. Follow these steps to install it.
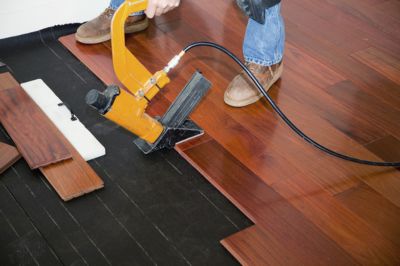
Step 1: Install first rows
To begin, the first row should be installed with the tongue toward the center of the space. Don’t forget to place the spacers between the wall and the boards, because there is not yet enough space for the floor stapler. Therefore, you will need to pre-drill this row by hand. Drill holes 1/2″ apart in the board, continuing every 6″ on the longer side. Next, drive flooring nails into the holes you drilled.
Now nail these boards to the floor. To do this drive a blind nail at a 45° angle. Then do the same for all the boards in the first row.
For the second row, place the groove in the tongue. Then tap laterally with the mallet. If you still don’t have room for the stapler, repeat these steps on the third row of boards.
Step 2: Install remaining rows of the space
At this point, you will be able to use the floor stapler. Therefore, you will no longer have to drive the blind nail by hand. Place the stapler under the board and up to the tongue. Then, tap firmly with the mallet, until the nail is in place.
Remember to leave expansion space on all walls of the space; also, consider staggering the rows. Also, make sure the boards are completely tight, there should be no gaps between them.
Step 3: Install last rows of flooring
At the end of the space, you will also have no room for the stapler. Therefore, you will need to install the end boards by hand. To begin, drill pilot holes in the boards, then screw them to the floor.
For the last row, cut the boards lengthwise to length, not forgetting the expansion space. Also, use the drawbar and mallet to fit the end pieces together.
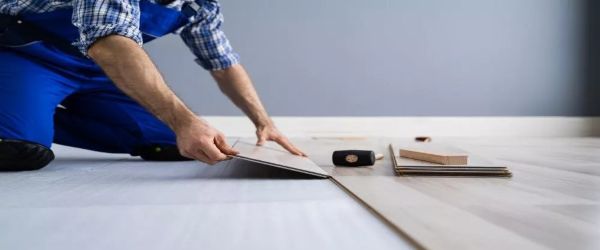
Click lock installation
Likewise, there is the click type installation on hardwood floors. It is the preferred type for do-it-yourselfers. The steps required for this installation are:

Step 1: Install the first row
In this type of installation you will have to nail the first row. Therefore, drill pilot holes in the boards. Then drill the pieces and screw them together, this will be the hardest part. Once you have installed the first row, the work will be easy.
Step 2: Install remaining rows
Then, just insert the groove in the tongue, click between the pieces. This way you will install from the second to the last row. Also, take into account the expansion space.
_____________
In any case, or type of hardwood flooring installation, the following steps are necessary, as they will help you to have your installation perfect.
Step 1: Acclimate hardwood flooring and decide where to start

Hardwood requires time to acclimatize, depending on the humidity and temperature of the location. Therefore, you will need your floor in advance. Also, when mixing the pieces with the design you want, take the opportunity to separate the damaged or deformed boards. However, we recommend that you save them, as they will be useful later on.
On the other hand, when deciding where to start, we recommend starting with the longest wall in the room, as this will reduce waste and installation time. Also, select the straightest boards for the first row. Also, install the underlayment before starting with the planks.
Step 2: Filling the holes with putty

Finally, use matching putty to fill the holes. This will be necessary in the first and last rows to hide the screws. In this step, you will also need to cut off the excess underlayment. Use the utility knife to do this. Also, if necessary, sand out any dents.
Step 3: Install moldings and transition pieces

To complete the installation, remove the spacers, place the baseboards together with the transition pieces to eliminate the space between the floor and the baseboard and fill the holes with putty.
Areas we serve
The hardwood flooring installation turns out to be quite complex due to its high level of difficulty, since it will require experience and skill to complete a project with these characteristics. Fortunately, Pisos Laminados de Madera has professional, certified and licensed installers; perfect to perform any type of installation in Florida, United States.
- Florida, United States: Davie, Miramar, Hollywood, Palm Beach, Weston, Doral, Miami, Sunrise, Pembroke Pines, Fort Lauderdale, Plantation, Boca Raton, Aventura, Brickell, Hialeah, Coral Gables, Pinecrest, Kendall & more.
Frequently asked questions about hardwood flooring installation
Here are answers to frequently asked questions about hardwood flooring installation.
- How much does it cost to install hardwood floors?
The cost depends on different facts:
- The floor type you have or wish to buy.
- The installation type you prefer
- The budget you have set for your project
- How to take care of hardwood floors?
Hardwood flooring requires simple care. Therefore, to keep it swept frequently, vacuum as often as possible. Also, wipe up spills immediately.
- How do you prepare the floor for hardwood flooring installation?
To do this you need to repair any cracks, also sand any bumps. However, if you hired our services, you won’t have to worry about this, because our team of professionals will certainly take this into account in your quote and service.
- How long do hardwood floors last?
Hardwood flooring is one of the most durable floors. Therefore, with good care and repair you can enjoy it for a lifetime. On the other hand, engineered wood floors can last up to 30 years.
- How often should you do hardwood floor refinishing?
Depending on care and use, your hardwood floor may need to be sanded and repaired. This can be done every 3 to 5 years, as it can suffer from scratches or wear and tear.
- Why choose the best laminate flooring?
Our service is fully guaranteed. We are backed by 15 years of experience in the market. In addition, our professionals are certified. Our customers are 100% satisfied because we have quality and compliance.
The materials and tools we use are of the highest quality. Therefore, you can be sure that your project will be a success, you will be more than satisfied.


